This video was sponsored by Pro Church Lights
Skin tones that look diseased, dark spots, hot spots, or just plain can’t see what’s going on…
If any of this sounds like your stage lighting, don’t worry. By the end of this video, you’ll know everything you need to know to dial in the most important part of your stage lighting.
Key lighting should be the number one priority when it comes to lighting design. In our live stream reviews, I see so many stages where the budget was allocated to fun colorful lights, but very little if any, was spent on getting the key lighting correct.
If it doesn’t look right, it can be very distracting for those watching in person and on the live stream. Here are a few things we want to make sure and address:
All of these goals are equally important. However, at this point, you might now be wondering how much this is going to cost.
Obviously, the higher the budget, the better your results are going to be. You might find that you need to invest in some new lights, or you might find that some simple adjustments to your current fixtures will do the trick.
To determine your next step, we need to talk about fixtures. Not all are created equal and the wrong type of fixture can make it impossible to get things right.
Here are the specs that we need to look at when shopping for key lights:
The first thing we need to consider is the color temperature of our bulb. Let me start this off by saying that RGB fixtures are not key lights and should never be used as key lights.
You can not mix all 3 colors together and get a pure white. It’s going to render awful skin tones. I also don’t recommend getting RGB fixtures that have a white bulb as well. The white is not going to be high quality and will not render good skin tones. They are usually not strong enough either.
What your looking for is a fixture that has a single white bulb with a color temperature between 3200 and 4000. I asked Frank from Pro Church Lights to explain why this matters and how to choose the correct color temperature for you.
Most fixtures you find these days are going to be LED and that’s the type I recommend. Not all LED bulbs are of the same quality though. A bulbs ability to produce natural colors is measured with a measurement called CRI which stands for Color Rendering Index.
Once we find a fixture with a high-quality white bulb at the proper color temperature, we need to consider its ability to direct the light. We don’t want our key lights blasting light anywhere and everywhere. We want to be able to control it so that it’s not casting light outside of its targeted area.
Let’s look at 3 different fixture types and how they allow you to manipulate your lights.
First up is a par can. A par can is just a cylindrical housing with a bulb and a reflector in it. They don’t typically allow you to adjust the width of the beam at all. However, most par cans can mount barn doors to them.
Barn doors allow you to block off your light from going where you don’t want it. Par cans are the cheapest type of fixture you can get. Even though they don’t allow beam adjustment, as long as you have barn doors, you can manipulate them pretty well.
A step up from Par Cans is Fresnels. Fresnels like this Pro Wash Plus from Pro Church Lights allow you to adjust the width of the beam with this knob on the side. It can go from 50 degrees at its widest to 17 degrees at its narrowest. This allows for even further fine-tuning beyond barn doors.
Adjusting the beam angle also changes the intensity of the light. 17 degrees is going to be brighter across the beam as you are focusing the same amount of light as 50 degrees, but into a smaller beam.
Fresnels usually have a much more consistent beam than a par can. Par cans tend to have a hot spot in the middle of their beam with much darker edges, while Fresnels have a much more consistent brightness from center to edge. Par cans can be smoothed out a bit with diffusion, but this also reduces the amount of brightness output as a trade-off.
The third type of fixture you’ll find is ellipsoidal. These are the most expensive kind of fixture and offer the best beam quality of the 3. An ellipsoidal is more of a spotlight and uses a lens attached to the front of the fixture similar to a camera lens. It focuses the light to a fixed beam angle that is specific to that lens.
If you have a large space with tall ceilings, this is the kind of light you are going to buy as it provides the best brightness over distance of the 3 fixture types.
For most churches, fresnels are going to be the best option. While not the cheapest, they provide the best bang for your buck and are a huge step up in key light quality compared to par cans.
My Fresnel of choice is the Pro Wash Plus. This fixture gives you great output for small to medium-sized auditoriums with a metal body, included barn doors, 15-50 degrees of beam adjustment, and a CRI of 97. It’s an incredible value. It also comes in black or white to accommodate different ceiling colors.
If you have taller ceilings, you can step up to the Pro Wash Max for increased output. Pro Church Lights also offers an ellipsoidal option for large auditoriums.
Here’s a quick review of what you should be looking for in a key light fixture.
Pro Church lights make it so easy to get the right fixture for your space. I highly recommend you book a free consultation with them via the link in the description.
For $99, you can get a visual mockup of your space done where Pro Church lights will show you what the fixtures will look like in your space and give you some inspiration for a creative look.
We had a mockup done for our church as if we were normal customers. Here's a few screenshots from our mockup as an example:
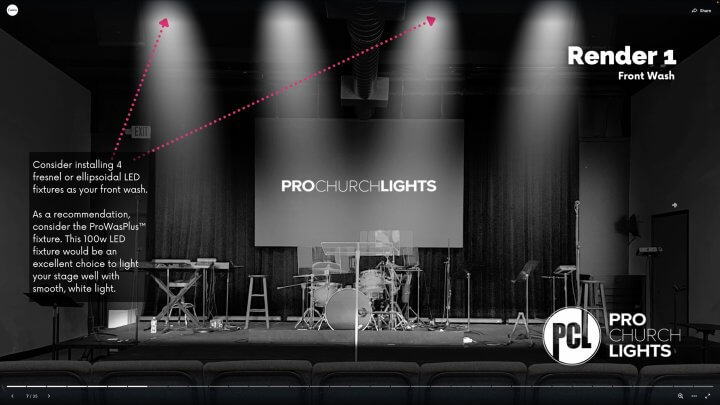
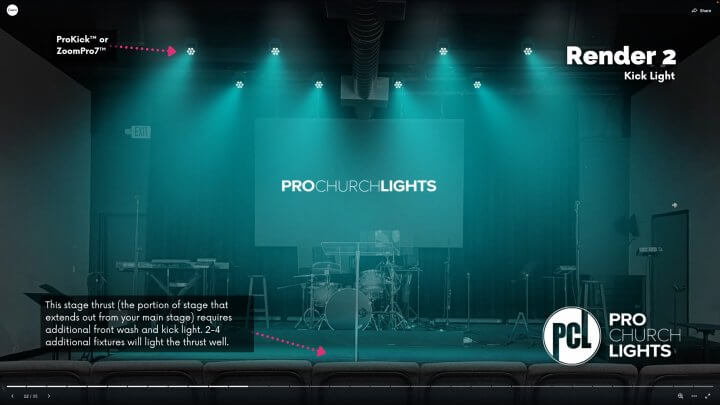
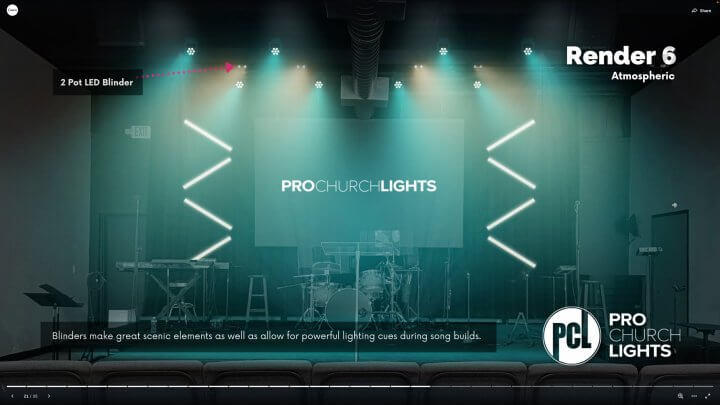
Get your visual Mockup for $99 now (normally $249)
Alright, now that you know exactly what fixture you need, let’s talk about how to position and fine-tune our fixtures.
We have a support beam that is really close to the perfect spot for hanging lights, but let’s say we didn’t… One thing we could do is mount some super strut between two of the support beams to give us more flexibility with how far away from the stage the lights are.
An easy way I’ve found to fine-tune how your lights are aimed is to put some pieces of paper on mic stands at the height of an average person, and position a few of them in different positions on the stage. Especially the middle, edges, and wherever the different fixtures crossover. This will give you a great reference for brightness consistency.
You also need to consider obstacles between your lights and the stage. In our case, we had to raise these two hanging house lights so they weren’t in the way. Otherwise, they would be casting shadows onto the stage and anybody standing on the stage.
Now this is where the barn doors play an important role. We have our key lights positioned where we need them, but we have light spilling onto the LED wall, the walls beside the stage, as well as the front row of chairs.
So we need to adjust the barn doors to keep the light off those areas. Once you get them adjusted to where the light is only going where you want it to, make sure to have someone walk around the lit area to make sure that they don’t walk out of the light. Keep in mind the height of a tall person on the stage as well.
If you are not able to keep the light off of the places that you don’t want it without causing dark spots where you do want it, you can try moving the light further forward or backward, just don’t go too much. You want to maintain as close to 45 degrees of downward angle as possible.
If moving slightly doesn’t work or is not an option, you might want to consider making modifications to the stage design and arrangement.
If you have done all of this, and are still not getting smooth consistent lighting across your stage, then you probably have the wrong fixture and or the wrong amount of fixtures. I highly recommend you reach out to Pro Church Lights and have them help you find the right solution. They seriously make it so simple to get your stage lighting looking great.
Checkout the Pro Church Lights Catalog
Disclaimer: Pro Church Lights paid us to promote their products in this video. However, we have throughly tested their products and would recommend them regardless. Our opinions of Pro Church Lights in this video are 100% our opinion.