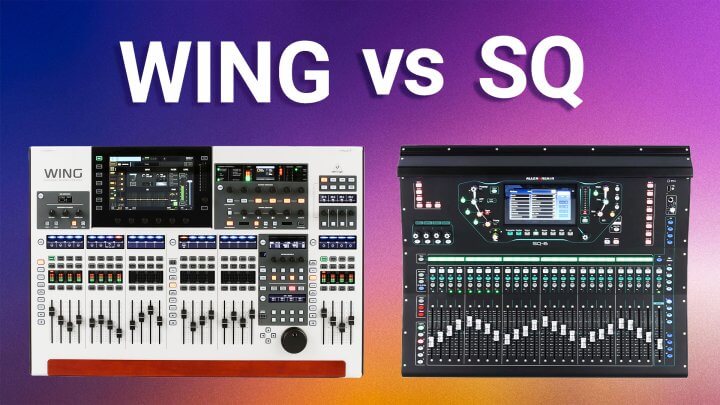
In this video, we compare the Behringer WING to the X32.
Should you upgrade to the WING? Should you get the WING instead of the X32? Find out in this video.
The Behringer Wing has been out for about four years, and I am just now getting my hands on one.
The X32 was working great, and I am not one who gets googly-eyed over the latest gadget. But when the guys at Sweetwater offered to let me check out the Wing, I couldn’t resist.
I’ve now created an entire mix from the ground up using the Wing for our Inner Circle subscribers. If you’d like to watch that video, subscribe to Inner Circle using the link in the description.
But before you do that, keep watching because I'm about to compare the X32 to the Wing so you can decide if it’s time for you to upgrade.
Just so you know where I’m coming from, I’ve been using the X32 for the last eight years. I love it so much, I even have a course to help you master the X32 called X32 Mastery.
Considering they are both Behringer products, I was curious how easy it would be to take my experience with the X32 and apply it to the Wing. It was not as easy as I thought it would be.
As far as the controls go, the channel strip is pretty much identical. But that’s where the similarities end. All the other controls on this mixer are not anywhere close to the same as the X32.
But you know what? It doesn’t matter because the screen on the Wing is a touch screen! My first time mixing on the Wing, I didn’t even use the other controls. I did everything from the touch screen.
With about a twelve hundred dollar difference between the Wing and the X32, the touch screen itself is worth the upgrade to me. It sped up and improved my workflow.
As time goes on, I’ll probably start including some of the other controls in my workflow. But since I didn’t find them intuitive right off the bat, the touch screen saved the day.
In case you can’t tell, I love the touch screen on the Wing.
Now, let me tell you about setting up routing on the Wing. It is nothing like the X32. It took me a bit to wrap my head around how to get everything configured the first time.
The X32 uses block and patch routing together to get audio signals where they need to go. I was expecting to see something similar on the Wing, but no.
The routing screen on the WING has three sections:
This is quite a bit different than the X32 where you have Input, AES50, Card, XLR, Out, Aux, P16, and User. All of this is simplified into three sections on the Wing.
Channels is where to configure the Wing’s forty-eight inputs. The left side shows you what is routed to each input. The right side let’s your browse from the many places to get your input.
You can grab them from one of the eight XLR Midas preamps on the back of the mixer, or from your digital snake, or what’s coming through the USB audio interface, or any of the other sixteen options you see on the screen.
To assign an input, tap the unlock button. Select the channel you want to assign. Then tap the source you want to use for that channel.
Pretty easy, as long as you are not expecting it to be as complicated as routing on the X32.
Now here’s where it gets interesting, on the Sources screen. We have everything we saw on the right side of the Inputs screen but with a few settings.
For each available source, the Wing saves the Name, Icon, Color, and polarity settings. This is whether you are using this channel on the mixer or not. That’s pretty nice.
So, on the Sources screen, you can go through and configure these settings for all of your available sources.
Lastly, the outputs screen is where you configure all of your outputs, whether it be to the local XLR outputs on the back of the mixer, or your digital snake outputs, or USB outputs, or any of the other eleven options on this screen.
Tap the unlock button. Then tap the output you want to program on the left and select your source from the plethora of options on the right.
In the end, routing is easier on the Wing. You just have to forget what you knew about routing on the X32 and enjoy the simplicity.
Once I got all that sorted out, it was smooth sailing. Setting gain, EQ, compression, and gating was quick and easy on the Wing’s touch screen.
Then it came time to set up reverb. I went to the effects screen and expected similar to the X32, but it wasn’t.
On the X32, this is where you’d program all of your effects settings and what channel or bus is using the effect. But on the Wing, this is simply an overview of the effects you have loaded in.
All settings can only be accessed on the channel or bus you have the effect loaded into.
For example. I loaded in a Plate Reverb for the Insert of Bus thirteen. Here is where I can adjust all the settings for that reverb.
Once it is loaded in, you’ll see it listed on the effects screen. And tapping the effect takes you right to the channel or bus that uses it. So, the effects screen is basically a shortcut.
Again, really easy as long as you aren’t expecting it to be like the X32.
Another interesting thing is there are no FX returns. This is great because you are no longer limited to only using four different effects that are accessible to all of your inputs.
Looks like on the Wing, you can use all sixteen buses for effects if you want to. Sounds a bit excessive, but maybe it’s not.
Let’s wrap this up with a question you are probably dying for me to answer. What does everything feel like compared to the X32?
Surprisingly, the faders feel about the same. I was hoping they would feel a little smoother, a bit more premium. But I honestly can’t tell much of a difference.
The buttons feel a bit nicer. They are firmer to the touch and have a flat surface, which I prefer to the beveled surface of the buttons on the X32.
The knobs are where you tell the biggest difference. They are smooth as butter on the Wing. And there is a little more resistance, which makes fine-tuning easier.
Too bad I didn’t use them much since everything can be done on the touch screen.
If you need a new mixer, I would choose the Wing over the X32. The extra $1,200 to get a touch screen, simplified routing, and eight more inputs - totally worth it.
On the other hand, if you have the X32 and it is working for you, I wouldn’t upgrade. Because now you are talking about spending over $4,000 for the differences I mentioned in this video.
They are worth $1,200, but not worth $4,000, in my opinion. But hey, the choice is yours.
Whether you decide on the X32 or the Wing, grab them on Sweetwater using the following links and support our channel in the process.
If you’ve never ordered from Sweetwater, do yourself a favor and make your next purchase there. They have the best price and outstanding customer service.
Of course, your mixer is only as good as your ability to use it. You can master either mixer quickly with lifetime access to my online course.
And hey, if you’d like to watch me create a mix from the ground up using the Wing, join my Inner Circle. You’ll get a whole lot more than just one video. It’s where you get the ongoing support you need to thrive in audio-visual.